
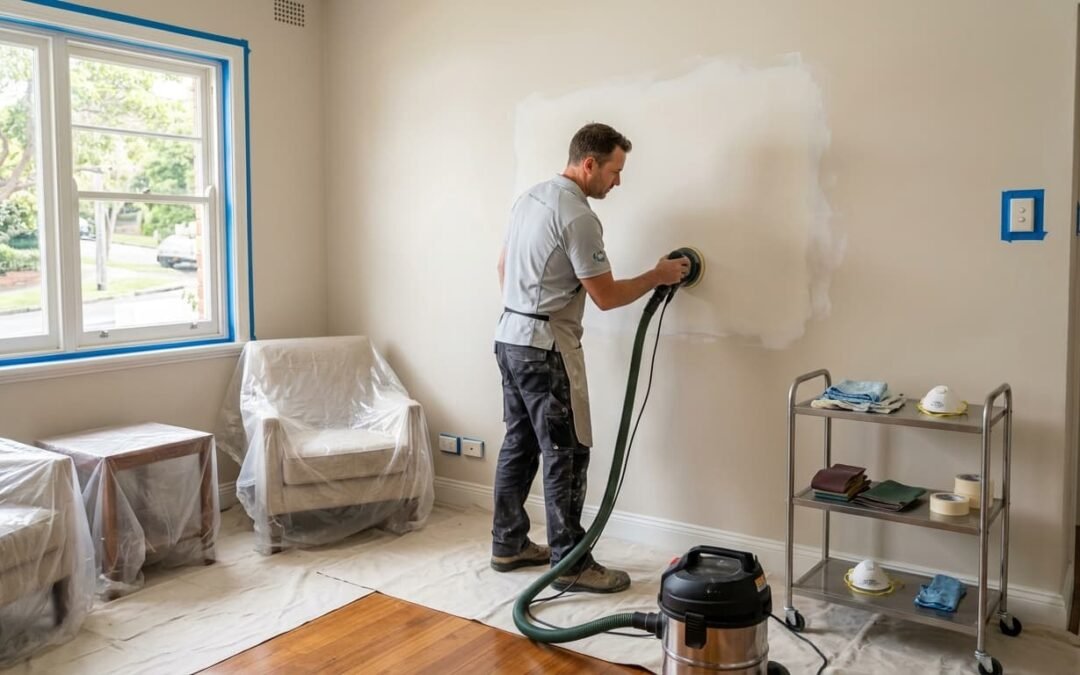
When a painted wall fails early, the problem is often underneath the finish coat.
We see the same warning signs repeatedly: a patch that was never sanded flat, paint applied over dust, a water mark covered before the leak was fixed, or a glossy surface recoated without enough preparation. Another coat may make the wall look fresh for a while, but it does not remove the weak layer underneath.
For us, preparation is not one generic step called “prep”. It is a series of decisions based on what is actually on the wall. One room may only need a few fixing holes filled. Another may need loose paint removed, old repairs levelled and stains sealed before colour goes anywhere near it.
BrushUp Painting has worked across Sydney’s Eastern Suburbs for more than 11 years. Mosi prepares every quote personally, so the preparation allowance can be discussed as part of the job rather than appearing as a vague line at the bottom of an estimate.
What preparation actually looks like on site
Preparation is everything that turns the existing surface into something we are comfortable painting. Depending on what we find, that may include:
- washing away grease, dirt, chalk or coastal salt
- scraping paint that is no longer firmly attached
- filling holes, cracks and dents
- sanding repairs so they cannot be felt at the edges
- dulling hard, glossy coatings so the next layer can grip
- sealing stains after the cause has been addressed
- priming bare, porous or difficult areas
- treating mould once the moisture source is understood
- repairing minor gaps around trims where included
- masking fixtures, windows and neighbouring finishes
- allowing enough drying time before coating
Not every wall needs every step, and we do not believe in adding work for the sake of it. Good preparation means doing what that surface needs and being clear about it in the quote.
Why we would not rely on the words “prepare and paint”
Many quotes say “prepare surfaces and apply two coats”. That could mean a quick dust, or it could include several days of scraping, filling and sanding. The client should not have to find out after work begins.
Before accepting a quote, ask what the preparation allowance actually covers:
- Are cracks and holes included?
- Will peeling areas be scraped back to a firm edge?
- Are repaired sections sanded and primed?
- How are stains handled?
- Is mould treatment included, and has the moisture source been identified?
- Are glossy surfaces sanded or treated with an adhesion primer?
- Does exterior work include washing away salt, dirt and chalking?
- What happens if hidden damage is uncovered?
The cheapest quote can become poor value when preparation is vague. Comparing the included work is more useful than comparing the final numbers alone. Read our guide to how painting quotes work in Sydney for a broader comparison checklist.
Step 1: work out why the surface looks the way it does
We start by looking at the existing coating, the material underneath it and what is happening around the area. A crack, stain or peeling edge is useful information. Covering it too early removes the chance to understand the cause.
We ask:
- Is the paint firmly bonded?
- Is the surface plaster, timber, masonry, metal or previously painted brick?
- Are the cracks stable or still moving?
- Is a stain caused by water, smoke, tannin or rust?
- Is the glossy finish too smooth for the next coat to grip?
- Is the wall damp?
- Has salt collected on an exterior surface?
- Is there old filler sitting proud of the wall?
We do not reach for the same primer every time. A water stain, bare plaster, glossy enamel and exposed timber are different problems and need different preparation.
Step 2: protect the property and isolate the work area
Surface preparation creates more dust and debris than the painting itself. Floors, furniture, benchtops, fixtures and adjoining rooms need protection before scraping or sanding begins.
A practical set-up may include:
- drop sheets suited to timber, carpet or tiles
- plastic or paper protection for fixed furniture
- masking around switches, handles, windows and fittings
- dust extraction connected to sanding equipment
- sealed doors or temporary barriers where needed
- a clear route for carrying materials
- daily removal of loose debris
In an occupied home, it is often better to complete one area at a time than open every room for sanding at once.
Homeowners can help by removing smaller belongings and providing access. Our guide to preparing your home for professional painters explains what to clear before the team arrives. The surface repairs themselves remain the painter’s responsibility.
Step 3: clean what the new paint needs to bond to
Paint does not bond reliably to grease, dust, salt or loose chalking.
Interior walls
Kitchen walls may carry airborne grease, while high-touch areas collect residue that is not obvious until it is cleaned. Bathrooms can have soap residue or mould. These surfaces need suitable cleaning and enough drying time before painting.
Exterior walls
Sydney’s coastal suburbs add salt and fine grime to exterior surfaces. Painting over that residue can interfere with adhesion. Exterior preparation may include pressure cleaning or controlled washing, followed by sufficient drying time.
Pressure cleaning is not a substitute for repairs. It removes contamination; it does not fix loose render, decayed timber or failing sealant.
For more on coastal conditions, read how Sydney’s salt air affects exterior paint.
Step 4: remove anything that is no longer sound
Loose paint must be taken back to an edge that is firmly bonded. Painting over a peeling section only attaches the new coating to the failing layer underneath.
Scraping should continue until the remaining paint is sound. The exposed edge is then sanded so the transition does not show through the new finish.
On exteriors, loose coating may point to more than age. Moisture, failed joints, poor previous preparation or the wrong paint system can all contribute. The cause needs attention before repainting.
Step 5: repair holes, cracks and damaged areas
Different defects need different repair methods.
Small holes and dents
Minor fixing holes and dents can usually be filled, sanded and spot-primed. The filler must be dry before sanding or painting.
Cracks
A hairline crack in stable plaster is different from a crack that continues to move. Repeated movement may need investigation or a flexible repair approach rather than harder filler alone.
Damaged corners and edges
Corners receive knocks and can lose their clean line. Repairs should rebuild the shape, not simply cover it with paint.
Timber defects
Timber may need failed coating removed, gaps addressed and bare areas primed. Rotten timber should not be hidden under filler and paint; damaged material may need repair or replacement first.
Water-damaged areas
A water stain is evidence of a problem, not the whole problem. The leak or moisture source must be fixed and the surface allowed to dry before stain sealing and repainting.
A simple way to tell whether a patch is ready
A filled hole can look flat when viewed straight on and still show badly after painting. We run a hand across the repair and look along the wall using light from a window or doorway. If the edge can still be felt, it will often be visible once the finish coat dries.
The repair needs to be sanded beyond the centre so the edge tapers gradually into the original wall. Painters call this feathering. More paint will not flatten a raised patch. The shape has to be corrected before the topcoat goes on.
Step 6: sand for smoothness and adhesion
Sanding has two different jobs:
- Smooth repairs and rough edges.
- Create a key on hard, glossy coatings so the next layer can bond.
The entire surface does not always need aggressive sanding. Over-sanding can damage plasterboard paper, soften detailed timber edges or create unnecessary dust. The method and abrasive should suit the material.
After sanding, dust must be removed. Priming over fine sanding dust can weaken adhesion and leave grit in the finish.
Step 7: use the right primer for the problem
Primer is not one universal product. Different conditions require different functions.
Bare plaster or new repairs
Porous plaster and filler absorb paint differently from the surrounding wall. Priming helps create a more even finish and prevents dull patches.
Stains
Water marks, smoke residue, tannin and some inks can bleed through ordinary water-based paint. A suitable stain-blocking primer isolates the mark after the source has been addressed.
Glossy surfaces
Hard enamels and other slick coatings may need sanding and an adhesion primer before repainting.
Bare timber
Timber primers help seal the surface and manage tannin or resin depending on the species and location.
Metal
Bare or rust-affected metal needs preparation and a compatible anti-corrosive system. Standard wall primer is not suitable.
The label “undercoat” does not automatically mean the product will solve every adhesion or stain problem.
Interior preparation by surface
Walls and ceilings
Inspect for dents, movement cracks, stains, previous patching and uneven texture. Ceiling light can expose defects differently from wall light, so both should be checked before painting.
Doors, trims and skirtings
These surfaces often have a harder existing enamel. They need cleaning, sanding and sometimes adhesion priming. Filling a chip without preparing the surrounding glossy area can leave the repair poorly bonded.
Kitchens and bathrooms
Cleaning is especially important. Grease, steam and residue can affect adhesion. Moisture issues must be resolved rather than sealed behind a new coating.
Previously dark walls
A strong colour change may require a tinted undercoat or additional finish coat. Preparation also includes confirming that the quote allows enough coverage for the new colour.
Exterior preparation in Sydney’s Eastern Suburbs
Exterior paint is exposed to sunlight, rain, humidity and coastal salt. Preparation must address the surface material and exposure.
Typical work may include:
- washing away salt, dirt and chalking
- scraping loose coating
- sanding exposed edges
- repairing minor render defects
- replacing failed sealant where included
- preparing weathered timber
- treating rust on suitable metalwork
- priming bare areas
- allowing wet surfaces to dry
Painting directly after rain or washing can trap moisture. Drying time is part of preparation, even when no one is physically working on the wall.
Where the time in preparation actually goes
A sound room with a few fixing holes is very different from one with water stains, cracked cornices and layers of old patching. The time is not only spent applying filler. It is also spent protecting the room, waiting for repairs to dry, sanding them flat, removing dust and priming the repaired areas.
The quote may change based on:
- number and size of repairs
- peeling or unstable existing paint
- detailed timberwork
- high ceilings and access
- stain-blocking requirements
- exterior washing and drying
- rust or weathered timber
- masking around joinery and fixtures
- whether the home is occupied
This does not mean preparation should be an open-ended charge. The inspected work should be written into the quote, and any genuinely hidden issue should be explained before the agreed scope changes.
For broader pricing factors, see how much it costs to paint a house in Sydney.
Signs we would not ignore during the job
Clients should feel comfortable asking questions if they notice:
- finish paint being applied over visible dust or grease
- loose paint left around peeling edges
- repairs painted before they are dry
- filler ridges that can still be felt
- stains covered without an appropriate sealer
- glossy surfaces painted without sanding or adhesion preparation
- mould painted over while moisture is still present
- bare patches receiving the same treatment as sound coated areas
- no protection for floors, furniture or adjacent surfaces
Not every job requires days of repair, but every job requires the painter to know what the surface needs.
Frequently asked questions
Do painters include preparation in the quote?
They should state what is included. Look for details about filling, sanding, scraping, priming and cleaning rather than relying on the words “prepare surfaces”.
Should walls be washed before painting?
It depends on the room and surface. Kitchens, bathrooms, high-touch areas and exterior walls often need cleaning. The important point is that the surface must be clean, sound and dry before coating.
Can paint cover cracks and holes?
Paint can change colour, but it cannot reshape a damaged surface. Holes and cracks generally need suitable repair, sanding and priming before finish coats are applied.
Why can I still see patches after painting?
The repair may be raised, insufficiently sanded, too porous or inadequately primed. Side lighting can make these differences more visible.
Does every surface need primer?
Not necessarily. Sound, compatible existing coatings may be repainted without a full prime coat. Bare, porous, stained, glossy or difficult surfaces often need a primer selected for that condition.
Ask what is happening underneath the paint
After more than 11 years in painting, we know premium paint is only one part of a good result. Dulux, Taubmans and other quality products still need a clean, sound and properly prepared base.
Mosi prepares BrushUp Painting quotes personally and explains the preparation allowed for before the job begins. The team then cleans, repairs, sands and primes according to the surfaces in front of us, not a generic checklist applied to every room.
If you are planning a repaint in Sydney’s Eastern Suburbs, call 0413 655 514 or explore our residential painting and interior and exterior painting services to request a quote.