
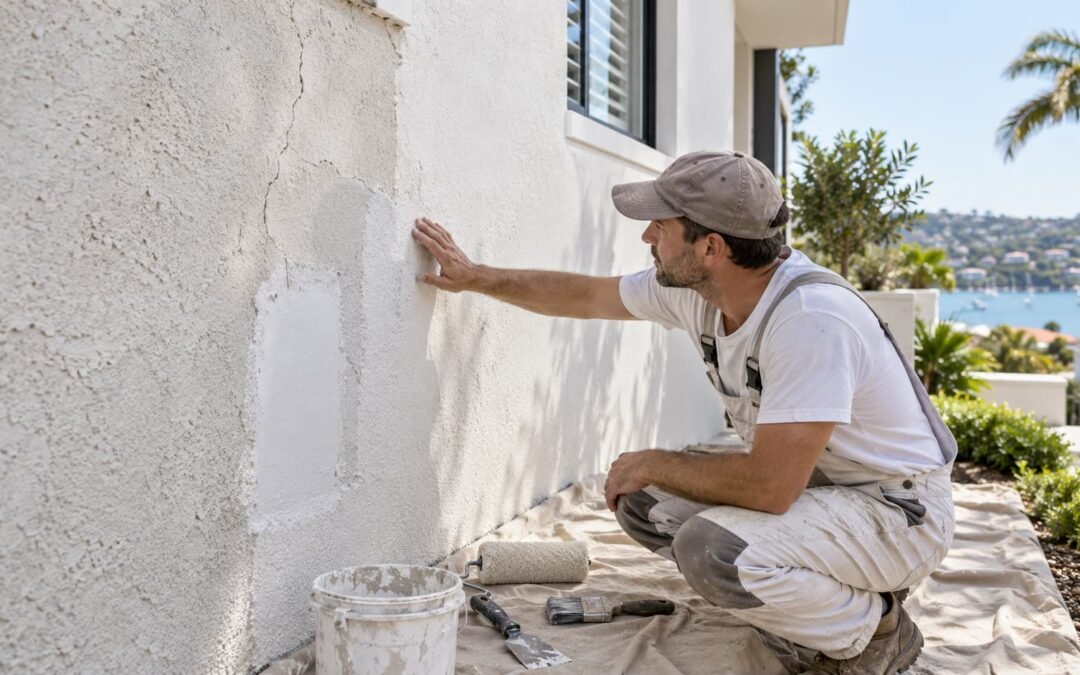
When we assess a rendered exterior, one of the quickest checks is simply rubbing a hand across the wall. If it comes away covered in powder, the surface is chalking. If paint bubbles sit below a parapet or beside a window, we start thinking about moisture. If a crack runs through the render rather than just the paint film, it may need more than filler and another coat.
These details matter because paint can protect sound render, but it cannot hold loose render together or stop an unresolved leak. A useful quote should tell you what the painter has found, what can be handled as part of preparation and what needs another trade before painting begins.
What we check before discussing colour
Rendered walls look like one continuous surface, but there may be several layers underneath: the wall substrate, render, patches, sealer, primer and old finish coats. Each one affects what can safely go on next.
Mosi prepares BrushUp Painting quotes personally. During the assessment, we look for:
- paint that is firmly bonded versus paint that is powdery or loose
- fine surface cracks versus cracks running through the render
- hollow or drummy areas
- bubbles and stains near windows, parapets or ground level
- white crystalline salt deposits
- old patches with a different texture or absorption rate
- walls receiving stronger sun, rain or coastal exposure
We would rather explain a problem at the quoting stage than cover it and hope for the best. Once the surface is understood, the colour and coating system can be chosen with much more confidence.
The problems we commonly find on painted render
Chalking
Chalking is the fine powder that comes away when you rub the wall with your hand. It often appears as exterior coatings age under strong UV.
This is easy to overlook because the wall can still look reasonably even from a distance. We do not treat it as ready for paint. The powder needs to be removed and the remaining surface checked. If it stays weak or highly absorbent, the coating specification may need a suitable sealer or primer before the finish coats.
Hairline cracks
Very fine cracks can occur in the coating or outer surface as materials age and move. Some can be prepared and treated within a painting system, but the pattern is important.
A single stable hairline is different from repeated diagonal cracking, cracks that keep widening or cracks around areas that sound hollow. Active or structural movement needs appropriate investigation. Painting over it may hide the line temporarily without solving the cause.
Peeling or flaking paint
Peeling means adhesion has already failed. Possible causes include poor original preparation, moisture, an incompatible coating or painting over a chalky surface.
Loose material must be removed back to a firm edge. The exposed area then needs to be cleaned, feathered and treated with products compatible with both the render and the remaining coating.
Bubbling and blistering
Bubbles can form when moisture or vapour pressure pushes against the paint film, although other adhesion problems can look similar. The location provides clues. Blistering below a parapet, beside a window or near the base of a wall may point to water entry that should be resolved before recoating.
Opening a blister and painting over it is not a complete repair if the wall is still taking on moisture.
Efflorescence and salt deposits
Efflorescence is a pale, crystalline deposit left as moisture moves through masonry and evaporates. It is evidence of moisture and soluble salts, not simply dirt.
The deposit needs to be removed correctly, but the more important question is why moisture is moving through the wall. Applying another impermeable coat without understanding the source can trap the problem and lead to more bubbling or peeling.
Mould and surface growth
Mould commonly develops on shaded or poorly ventilated areas that stay damp. It should be treated rather than painted over. Nearby vegetation, leaking gutters and slow-drying walls may also need attention so the freshly painted surface does not return to the same condition.
When we stop and recommend repair first
There is an important line between paint preparation and building repair. Minor stable surface defects may fit within the painting scope. We would pause and recommend further investigation when:
- render sounds hollow or is separating from the wall
- cracks are wide, active or linked to building movement
- water is entering through flashings, roof junctions or windows
- large patches are crumbling
- an old repair keeps cracking in the same place
- damp appears to be rising from the base of the wall
This is not an attempt to make the job complicated. It is the opposite. There is little value in paying for a neat finish over a section that is still moving or taking on water. The written quote should clearly state which patching is included and what needs to be repaired first.
How we prepare a sound rendered wall
There is no single preparation package for every rendered home. One wall may only need cleaning and local repairs, while another needs loose coating removed, patches sealed and a broader primer coat. The following is the sequence we use to think through the work, adjusted to what is actually on site.
1. Protect and clean surrounding areas
Paving, windows, plants, metalwork and neighbouring surfaces need protection before washing, scraping or coating begins. Exterior render can release a surprising amount of dust and old coating during preparation.
The wall is then cleaned to remove dirt, salt, mould and loose chalk. Washing should be controlled around openings and damaged areas so water is not driven into the building.
2. Test adhesion and remove loose coating
Existing paint should be checked across more than one small area. Sun-exposed and shaded elevations may behave differently even when they are the same colour.
Loose coating is removed back to a sound edge. Sharp transitions are feathered so they do not remain obvious through the new finish.
3. Repair stable surface defects
Minor stable defects can be prepared with an exterior repair material suited to the render and coating system. Patches need time to cure and dry as required by the product before priming.
Texture matching matters. A perfectly smooth patch on a coarse rendered wall can remain visible after two finish coats. The repair should aim to match the surrounding profile as closely as practical, not only fill the depth of the crack.
4. Seal or prime where required
Bare render, repaired areas, chalky surfaces and high-suction patches may absorb paint differently. A compatible sealer or primer helps control that absorption and provides a reliable base for the topcoats.
The correct product depends on the substrate, the old coating and the condition. A general-purpose primer is not automatically suitable for every masonry problem.
5. Apply the specified exterior coating
The finish system should suit masonry, the expected movement and the home’s exposure. BrushUp uses premium products from manufacturers such as Dulux and Taubmans, selected after the surface has been assessed.
Application needs to achieve the manufacturer’s required coverage rather than simply make the colour look solid. Thin or uneven coverage can reduce durability, especially on textured walls with high and low points.
Breathability and moisture need careful thought
It is tempting to describe any heavy exterior coating as “waterproof”, but the building still needs a compatible system. Rendered walls can receive moisture from rain, failed junctions, internal conditions or the substrate itself.
A painter should not promise that paint will fix an unresolved leak. The aim is to use a system suited to the wall after active moisture sources and necessary repairs have been addressed.
Homes near the coast add salt and wind-driven rain to the equation. Walls facing the ocean may chalk, stain or lose adhesion sooner than sheltered sections. BrushUp’s guide to how Sydney’s salt air affects exterior paint explains the broader coastal maintenance issues.
Repainting previously painted render
Previously painted render does not always need to be taken back to bare material. If the existing coating is sound and compatible, it can often be cleaned, prepared, spot-treated and recoated.
More investigation is justified when:
- the old coating softens or lifts during cleaning
- several layers are peeling together
- previous patch repairs show different absorption or texture
- the surface remains powdery after cleaning
- moisture-related defects return in the same areas
- the type of existing coating is uncertain
A small compatibility or adhesion test can be more useful than assuming the same preparation will work across every elevation.
Choosing colour and sheen on textured walls
Render catches light differently from a smooth wall. Coarse texture creates small shadows, while patched sections can stand out more at certain times of day.
Lower-sheen exterior finishes often reduce glare and make minor texture changes less obvious. Colour samples should be viewed on the actual wall in both sun and shade. Strong Sydney light can wash out pale colours and make a large facade look different from a shop swatch.
Very dark colours also absorb more heat. Before choosing one, consider the wall’s exposure, the coating system and any manufacturer guidance.
For a wider approach to palettes, read BrushUp’s guide to choosing exterior paint colours for an Eastern Suburbs home.
What usually changes the quote
Rendered walls are a good example of why quoting by square metre alone can be misleading. Height and access matter, but the condition of the coating is often the bigger question.
We allow for factors such as:
- whether the existing paint is firmly bonded
- cleaning and mould treatment
- the number and type of cracks
- patch repairs and texture matching
- bare or high-suction areas that need sealing
- access around upper levels and tight boundaries
- the size of the colour change
- protection of windows, paving and landscaping
- repairs by another trade that must happen first
When comparing quotes, ask how the painter has allowed for preparation rather than only asking how many coats are included. BrushUp Painting provides a written fixed-price quote with no hidden costs once the agreed scope has been assessed.
Questions we would ask when comparing quotes
If two prices are far apart, compare the preparation and exclusions line by line. Useful questions include:
- How will chalk, salt deposits and mould be treated?
- Which cracks are included, and which ones need further repair?
- Will bare render and patches be sealed or primed?
- How will patch texture be matched to the surrounding wall?
- What happens if loose or hollow render is uncovered?
- How will moisture-related areas be handled?
- Are access equipment and protection included?
A lower figure may be completely reasonable, or it may simply omit the work needed to make the wall ready for paint. The written scope should make that difference visible.
Planning an exterior render project
Ask the painter how access, washing, preparation and weather will be managed. Useful points to confirm include:
- where access equipment will sit
- how adjacent glass, metal and paving will be protected
- which repairs are included
- what happens if loose render is discovered during preparation
- how drying conditions will be checked
- how the work will be staged around entrances and neighbours
- what the final inspection covers
BrushUp Painting keeps sites neat, communicates clearly and completes a thorough clean-up. Mosi stays directly involved from the first inspection through the project, so clients have one clear point of contact.
Frequently asked questions
Can you paint directly over old painted render?
Only if the existing coating is clean, firmly bonded and compatible. Chalking, peeling, moisture and loose render need to be addressed first. Bare or repaired areas may also need a suitable sealer or primer.
Will exterior paint hide cracks in render?
Paint may visually soften very fine, stable imperfections, but it will not repair active movement or loose render. Cracks should be assessed and treated according to their cause before coating.
What causes paint to bubble on rendered walls?
Moisture is a common cause, but poor adhesion and incompatible coatings can also create blisters. The location and condition of the wall need to be inspected before deciding on the repair.
Does all render need a sealer before repainting?
Not necessarily. Previously painted, sound render may only need local priming after preparation. Bare, repaired, chalky or highly absorbent areas can require a sealer or primer. The coating specification should follow the condition of the wall.
Can rendered walls near the coast be painted?
Yes. They need thorough cleaning, sound preparation and a coating system suited to the exposure. Salt accumulation and wind-driven rain also make regular inspection and maintenance important.
Get a clear answer before the wall is covered
After more than 11 years in painting, we know clients value a straight answer about what paint can and cannot fix. If the render is sound, we can explain the preparation and coating system. If it needs repair first, we will make that clear before the job starts.
Mosi works directly with each client and prepares BrushUp Painting’s fixed-price quotes personally. See our interior and exterior painting service or call 0413 655 514 to arrange a quote.